How To Use A Drill Press – Tips & Safety
How To Use A Drill Press – The drill press allows you to make holes in a workpiece in a controlled and precise manner. As far as the construction of the drill press goes, it has only a few main parts that you need to understand. The base, work-table, column, and the head of the drill press are the main parts.
The best drill presses tend to have an adjustable work table so that you can put it in the perfect position for whatever job you’re working on.
Unlike a hand drill, the drill press is not particularly portable. Because of the construction and how the drill press is designed it is far more suited for drilling precise holes in larger objects, it’s also great for when you need to repeat the same hole over and over.
As you should be able to tell by now, the drill press is an extremely useful and versatile tool, however, if you don’t have the knowledge of how to properly use a drill press it won’t do you much good. That’s why we’ve created this guide on how to use a drill press. Let’s get started.
This site uses ads and affiliate content, earning commission on qualifying sales. Disclosure.
How to use a drill press – Step by Step
Table of Contents
The first step is setting the speed.
The first step you should do before using your drill press is setting the speed. The speed is adjusted differently depending on the type of drill press you’re using.
On some drill presses, the speed can be adjusted by moving the drive belt to a different sized pulley, on other drill presses it is as easy as flicking a button to a different setting.
Generally, the slower speeds are ideal for metal, and faster speeds are more suited to wood, but it does differ from material to material, so the best option is to check online for whatever material (aluminum for example) you’re drilling.
Step 2
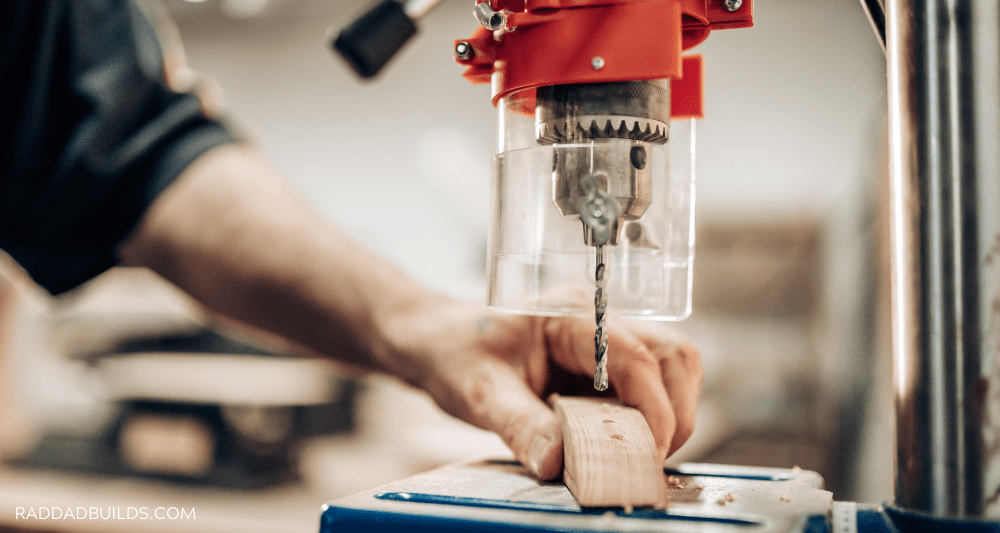
The second step to using your drill press is to insert the drill bit securely. To do this you need to open the chuck, slip the drill bit into place, and then tighten the jaws of the chuck with the key.
Make sure that you remove the chuck key after you’ve tightened things up, otherwise, this can fly out when you start the drill press up.
Step 3
For the fourth step, is you should gauge the depth. This step isn’t necessary if it doesn’t particularly matter how deep you drill a hole in the workpiece. But, if you want to drill holes repeatedly at a set depth then you need to adjust the depth gauge appropriately.
To adjust the depth gauge you should put the drill bit at the desired height and then set the nuts on the depth gauge at the appropriate stopping point.
Step 4
The third step is to adjust the table to the right height. Most drill presses have a handle that can be wound to adjust the height of the work table, and others can be adjusted by releasing the clamp holding it in place.
Getting the table height just right for the job you’re working on is very important.
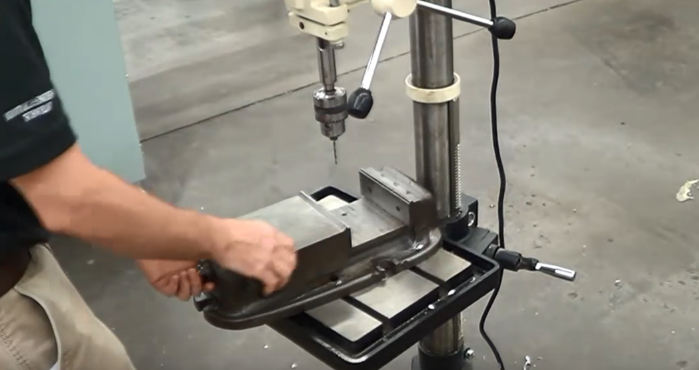
Step 5
The fifth step is to secure the workpiece (the piece of metal or wood you’re drilling) in place. This step is vital, as doing this wrong can put your safety at risk.
If it is not fixed firmly in place the rotation of the drill bit can result in the workpiece spinning dangerously fast, or being flung across the room. The solution to this problem is clamping the workpiece in place using a drill press vise or some other method.
Drill Press Uses
After you’ve completed all of the above steps the only thing left to do is to drill. Be sure that all the steps are completed before you move on drilling into the workpiece.
When you’re ready lower the spinning drill bit toward the workpiece by grabbing and pulling/rotating the lever. When you’re done drilling the hole you can simply release the lever, and on most drill presses it will be spring-loaded to return back up.
Helpful Related Guides: